Windows Server Installation
For Windows system installation, we recommend servers with a minimum of 2hCPU!
Installing Windows will erase all Linux data and files.
- Install a Linux system on your server.
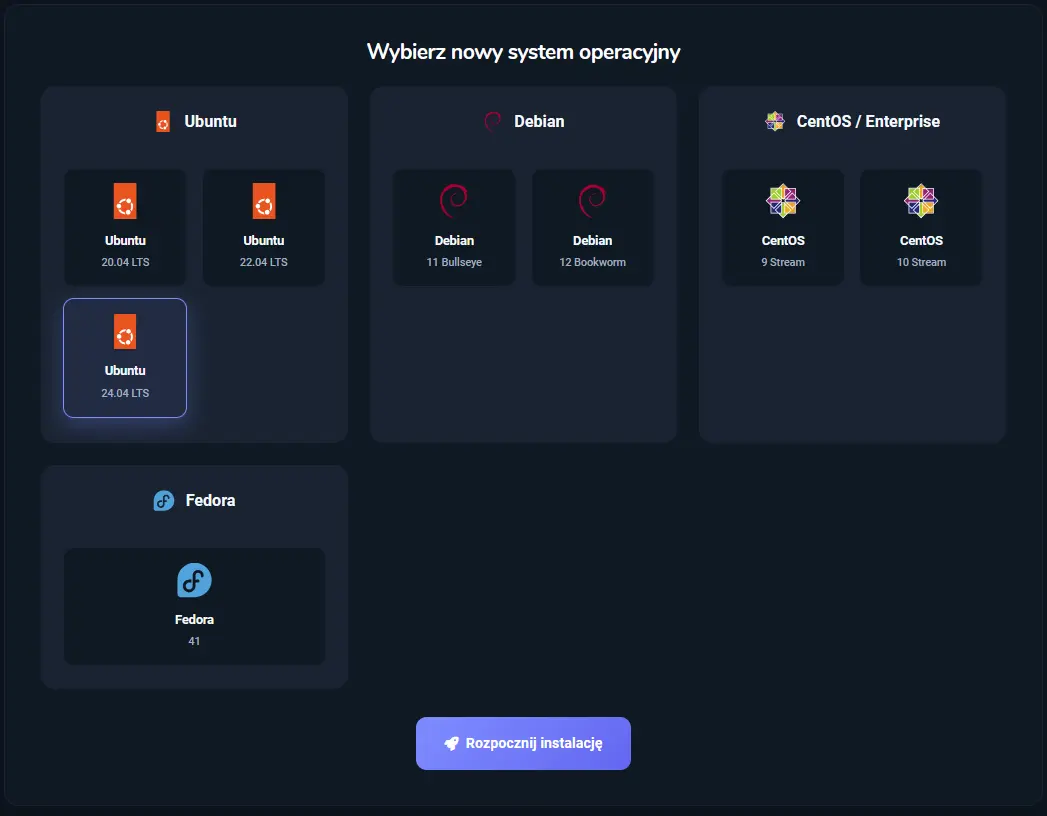
- Start the VPS server.
- Go to the VNC Console tab.
- In the „Primary Drive” and „Secondary Drive” options, select respectively „Windows Server 2022” and „Sterowniki VirtIO”

- From the console’s left menu, select the Commands tab, then click Hard Reset and confirm the popup window.

- After the Hard Reset, quickly open the side panel, select Show Extra Keys, and press the ESC key.

The ESC key must be pressed very quickly — exactly when the Proxmox logo appears on the screen. If missed, you will need to perform Hard Reset again.
- The boot menu will appear. Choose the option containing (SSS…..). In our case, enter digit 3.
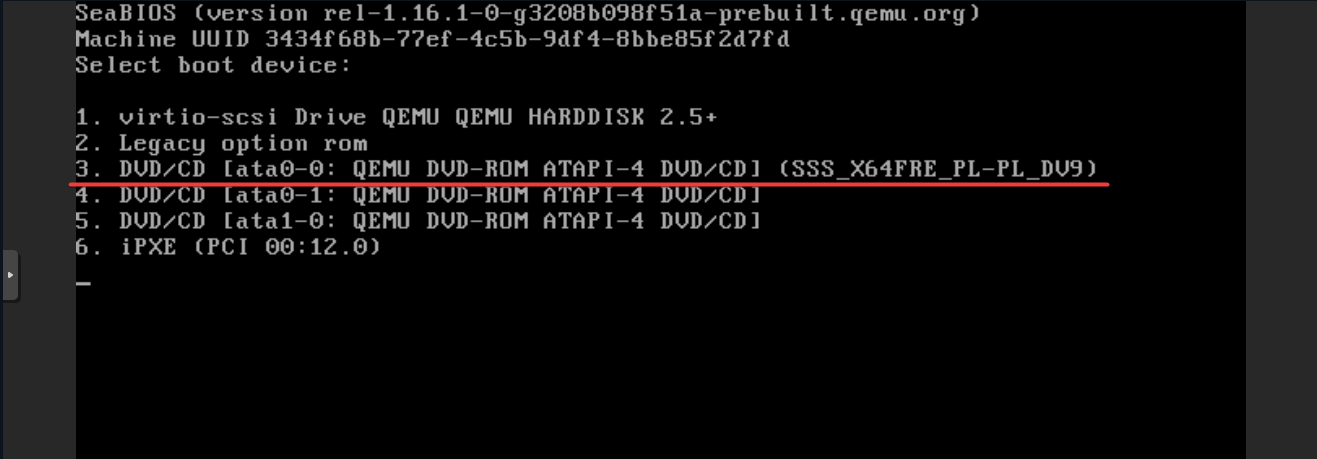
New servers may have BIOS access. Hence, step 7 may differ. In that case, use the Boot Manager tab, then select DVD Rom with ID 1.
- In the first window, click „Next”, optionally change the languages to your preference.
- In the next window, click „Install Now”.
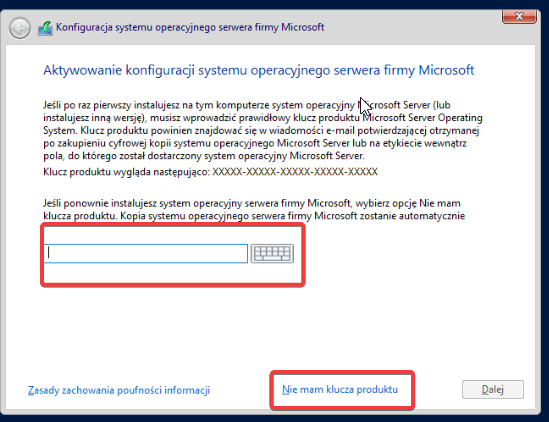
- Enter a previously purchased key or select the option "I don’t have a product key", which allows free use of the system for 180 days.
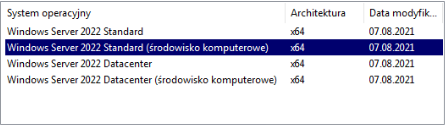
- Select the operating system in the second position — "Windows Server 2022 Standard (Desktop Experience)".
- Read and accept the license terms.
- Then select the „Custom” installation.
- An empty partition list should appear; then choose „Load Driver”.
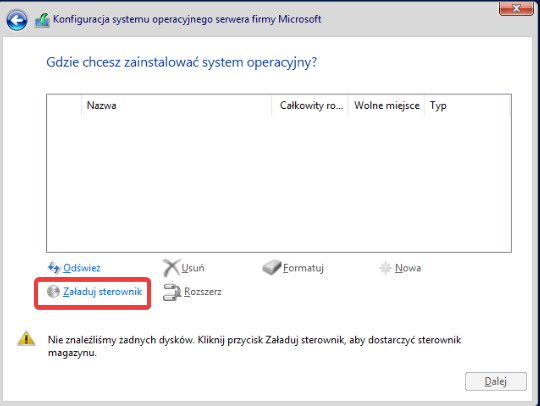
- In the information window, click „OK”.
For Windows Server 2025, the disk must be converted from MBR to GPT. Instead of steps 16–18, do the following:
- Instead of selecting a driver from the list, manually point to virtio → amd64 → 2k25 and load the vioscsi.inf driver.
- Open a command prompt (CMD) with Shift + F10. If the window does not appear, press the shortcut again – sometimes it takes two presses.
- In the CMD window, enter the following commands one by one:
diskpart
list disk
select disk 0
clean
convert gpt
exit
- Return to the installer window, select any existing partition and click "Refresh" to refresh the disk list.
- Select "Drive 0 Unallocated Space" and confirm by clicking "Next".
- Complete the rest of the installation as usual, starting from step 19.
- From the driver list, select the one dedicated to Windows Server 2022 (2k22).
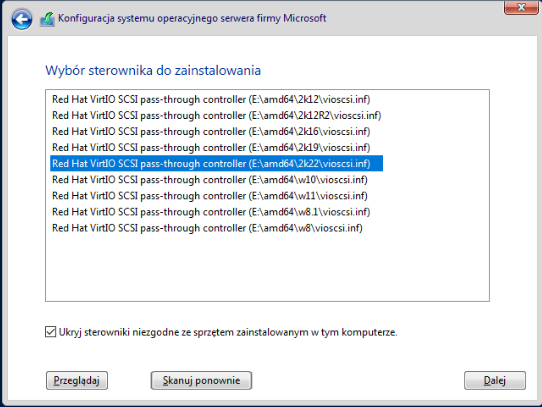
- After loading the drivers, delete all existing partitions. Select a partition, click Delete, and confirm the popup by clicking OK.
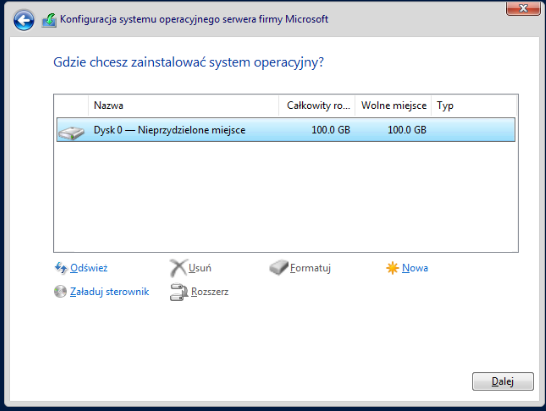
- After deleting all partitions, select Disk 0 - Unallocated Space and confirm by clicking Next.
- Wait until the installation completes; it may take several to a dozen minutes. Then create an account by entering your own password and proceed.
The password must contain: special characters (e.g., !@#$%^&*), numbers, lowercase and uppercase letters. We recommend a password at least 12 characters long.
- To log in, use the Ctrl+Alt+Delete combination available in the panel on the left side.
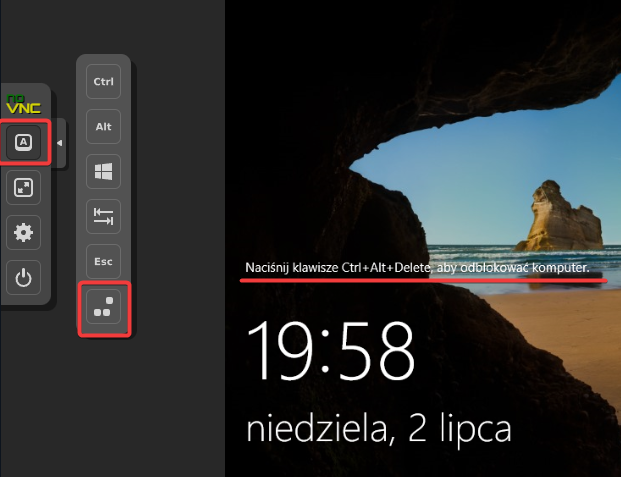
The next step is to configure the network on the server and enable Remote Desktop for further management.